 Support Helpline: 0333 456 5776


How to Fix A Leaking Conservatory Roof

A leaky conservatory roof can turn your tranquil retreat into a headache. It’s a common problem and we’re here to help.
What Causes a Leaking Conservatory Roof?
Leaks can occur for various reasons, including:
Wear and tear over time
Improper installation
Damage from harsh weather
Understanding the frustration and inconvenience this issue brings, we aim to not only guide you through effective temporary fixes for your leaking conservatory roof but also introduce you to the ultimate solution: replacing your conservatory’s roof with a solid one.
Leaking Conservatory Roof? Let Us Help

1. Steps for Visual Inspection:
- Clear the Area: Begin by removing any furniture or items from under the leak to prevent damage and provide clear access.
- Look for Visible Signs: Inspect the interior of the conservatory during daylight. Look for any signs of water trails, staining, or mould growth on the ceiling and where the roof meets the walls.
- Check the Exterior: Safely use a ladder to examine the conservatory roof from the outside. Pay close attention to roof panels, seals, and joining points between panels. Cracks, gaps, or any signs of wear could be the culprits.
- Note the Details: Document the locations of any irregularities with photos or notes. This information is crucial for repair discussions.
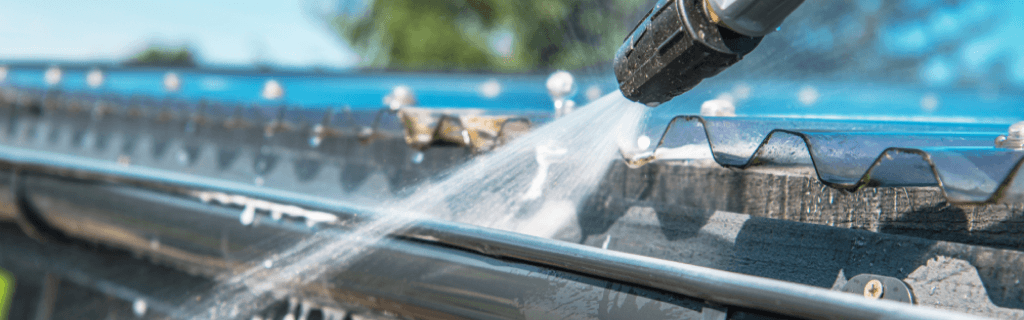
2. The Water Test Method:
If a visual inspection doesn’t reveal the leak’s source, the water test method can be the next step.
- Enlist Help: This method requires at least two people – one to apply water to the roof’s exterior and another to observe from inside the conservatory.
- Prepare Your Tools: You’ll need a garden hose with a steady, moderate flow of water. Avoid high pressure, which can cause additional damage.
- Conduct the Test: Starting from the lowest point of the roof, gently apply water to one section at a time, allowing a few minutes between each section. The person inside should watch for any water making its way through.
- Identify the Leak: Once water appears inside, you’ve found the general area of the leak. Mark this area for repair.
Remember, if you’re unsure about any step or if the repair seems complex, consulting with a professional is the best course of action to ensure a safe and durable solution. Get in touch for advice and support.
Temporary Fixes for a Leaking Conservatory Roof

If you’re facing the common headache of a leaky conservatory roof, there are a couple of temporary fixes you can implement to keep the water at bay until you’re ready for a more permanent solution.
Applying Waterproof Sealant
1. Identify the Leak: First, you need to find exactly where the leak is coming from. Look for any visible signs of water ingress or damage.
2. Clean the Area: Before applying any sealant, clean the area around the leak thoroughly. Remove any dirt, moss, or debris to ensure the sealant adheres properly.
3. Choose the Right Sealant: Choose a waterproof sealant that’s suitable for use on conservatory roofs. Make sure it’s compatible with the material of your roof.
4. Apply the Sealant: Following the manufacturer’s instructions, apply the sealant over the leak and surrounding area. Use a caulking gun for an even application, making sure to cover the entire area where water might enter.
5. Allow to Dry: Let the sealant dry completely, according to the time specified on the product. Check for any missed spots once it’s dry and apply more sealant if necessary.
Replacing Damaged Seals
1. Inspect the Seals: Carefully examine the seals around your conservatory roof panels. Look for any that are damaged, worn, or have shrunk away from the frame.
2. Remove Old Seals: Gently remove any damaged seals. You might need a flat tool to pry them off, but be careful not to damage the roof panels.
3. Clean the Grooves: Once the old seal is removed, clean out the grooves where the seal was seated. Ensure they’re free of dirt and old adhesive.
4. Measure and Cut New Seals: Measure the length needed for the new seals and cut them to size. It’s better to cut a little longer than too short.
5. Install New Seals: Fit the new seals into the grooves, starting at one end and working your way along. Press firmly to ensure a snug fit.
6. Check for Gaps: Once installed, inspect the seals for any gaps or areas that aren’t properly seated. Adjust as necessary to ensure a watertight seal.
Remember, while these solutions can be effective in the short term, it’s important to consider a permanent fix to avoid future leaks and potential damage.
Professional Repairs for Your Conservatory Roof

When dealing with a leaky conservatory roof, there comes a point where temporary fixes just won’t cut it anymore.
That’s when it’s time to call in the professionals. Here’s a guide on recognising when professional help is needed and what to expect during a professional assessment.
When to Call in a Professional
- Persistent Leaks: If leaks persist despite temporary fixes, it indicates a more complex issue that requires professional expertise.
- Visible Damage: Significant damage, such as cracked panels or a sagging roof structure, is a clear sign you need a professional repair service.
- Aged Conservatory: An older conservatory might need a thorough inspection to identify and rectify potential vulnerabilities that could lead to leaks or structural issues.
What to Expect from a Professional Assessment
1. Comprehensive Inspection: A professional will conduct a thorough examination of your conservatory roof, both from the inside and the outside. They’ll look for signs of damage, wear, and potential leak sources that might not be visible to the untrained eye.
2. Diagnosis and Explanation: After the inspection, the professional will explain the root causes of the issues. They’ll point out specific problem areas and provide a detailed explanation of what needs to be done to fix them.
3. Tailored Solutions: Depending on the assessment, the professional might suggest various repair options tailored to your conservatory’s specific needs. This could range from replacing damaged panels or seals to more extensive structural repairs.
4. Quote and Timeline: You’ll receive a detailed quote outlining the costs involved in the repairs. The professional should also provide a timeline for how long the repairs will take, allowing you to plan accordingly.
How to Fix a Leaking Conservatory Roof: The Ultimate Solution

Replacing a leaking conservatory roof with a solid roof is a long-term solution for homeowners looking to enhance their living space.
Lightweight Roofing Solutions excels in installing the SupaLite Tiled Roof system. This innovative solution not only fixes leaks but transforms your space with added benefits:
- Add Light to Your Space: The SupaLite Roof with an optional SkyVista glass panel bathes your conservatory in natural light without sacrificing comfort or warmth.
- Unmatched Insulation: With a U-value of 0.15 the SupaLite Roof provides unparalleled insulation. Say goodbye to the chill of winter and the heat of summer and hello to a comfortable space year-round.
- Quality You Can Trust: The SupaLite Roofs meets all building regulations.
- Energy Efficiency: Leaky roofs lead to lost heat and higher energy bills. By upgrading to a SupaLite tiled roof, you’re investing in a roof that’s up to 15 times more energy-efficient, potentially saving you around £200 a year on energy costs.
- Tailored to Your Home: With our range of customisation options—from colour-matched fascias, soffits, and gutters to a variety of tiles and slates—your upgraded roof will look like it was made just for your home.
With Lightweight Roofing Solutions, fixing your leaky conservatory roof becomes an opportunity to enhance your home’s efficiency, aesthetics, and comfort.
Maintenance Tips to Prevent Future Leaks
Keeping your home leak-free requires regular maintenance and vigilance. Here are some essential tips to help you prevent future leaks, ensuring your home remains dry and comfortable throughout the year.
Regular Inspection Tips
- Schedule Bi-annual Inspections: Make it a habit to inspect your roof, windows, and conservatory twice a year—once in the spring and again in the fall. These inspections can help you catch potential issues before they turn into costly repairs.
- Look for Signs of Wear: Pay special attention to areas around vents, chimneys, and skylights. These are common sites for leaks to develop. Look for cracked or missing tiles, damaged shingles, or any signs of wear and tear.
Cleaning Gutters and Downspouts
- Remove Debris: Gutters clogged with leaves, twigs and other debris can cause water to back up and potentially enter your home. Clean your gutters and downspouts regularly to ensure water can flow freely away from your house.
- Check for Blockages: Even if your gutters seem clean, blockages can occur in the downspouts. Flush them with water to ensure no hidden clogs are preventing proper drainage.
Checking and Replacing Seals and Flashing
- Inspect Seals around Windows and Doors: Over time, seals can become worn or damaged, leading to potential leak points. Inspect these seals regularly and replace any that are cracked or peeling.
- Examine Flashing: Flashing is used to direct water away from critical areas of your roof. Check that the flashing is intact and securely attached. If you notice any rust, damage, or gaps, it may be time to replace it.
Regular upkeep not only prevents water damage but also extends the life of your home’s exterior features.
Don’t wait for the next downpour to fix your leaking conservatory roof. Contact Lightweight Roofing Solutions today for expert advice and bespoke solutions made for you.
Blogs of Interest
Pitched Roof Conservatories: A Comprehensive Guide
Comparing Conservatory Roof Options: Glass vs. Polycarbonate vs Tiled
Are Solid Conservatory Roofs Worth it
FAQs
How do you stop a conservatory roof from leaking?
Replacing a leaking conservatory roof with a solid roof offers a lasting solution. Upgrading to a SupaLite Tiled Roof allows you to benefit from:
- Increased natural light with optional SkyVista glass panel.
- Exceptional insulation with U-values as low as 0.12.
- The SupaLite Roof is compliant with building regulations and JHAI type approval.
- Up to 15 times more energy-efficient, potentially saving £200 annually.
- Customisable options for a tailored look to your home.
With Lightweight Roofing Solutions, fixing your leaky roof means enhancing your home’s efficiency, aesthetics and comfort.
What is the best sealant for conservatory roof?
When looking for the best sealant for your conservatory, choose a high-quality, waterproof sealant designed for outdoor use and compatible with your conservatory roof material. Look for durability, weather resistance and ease of application to ensure long-lasting protection against leaks.
How much does it cost to fix a leaking conservatory roof?
Fixing a leaking conservatory roof can vary in cost. Choosing the SupaLite roof, despite the initial investment, offers long-term savings. Its durability and energy efficiency lead to reduced energy bills and maintenance costs over time, providing homeowners with both reliability and cost-effectiveness.
 Opening Times: Mon - Fri: 9am - 5pm | Sat: 9am - 12pm
  Opening Times: Mon - Fri: 9am - 5pm | Sat: 9am - 12pm